Jenkins on OpenShift - how to use and customize it in a cloud-native way
I can’t imagine deployment process of any modern application that wouldn’t be orchestrated by some kind of pipeline. It’s also the reason why I got into containers and Kubernetes/OpenShift in the first place - it enforces changes in your approach toward building and deploying but it makes up for with all these nice features that come with Kubernetes. OpenShift comes with Jenkins as the main orchestrator for pipelines but what I’ve noticed is that in many cases it’s used improperly. People tend to apply their old habits they’ve used for so many years on Jenkins instances running on traditional infrastructure (VMs, bare-metal) and it ends with making this even a lot messier and harder to maintain when it’s deployed in containers. It turns out that you can use Jenkins efficiently and leverage OpenShift platform features. In this article, I’m going to show you how to do it.
Why Jenkins
Some may question the choice of Jenkins since its first version was released in 2011 and its origin project (Hudson) it has forked from, is even older - it was created in 2005. So why do we even consider this software which hasn’t been designed for containers or even cloud environments? There are a few reasons why you might want to stick with Jenkins instead of choosing other CI/CD projects or products.
1. Myriad of plugins
Indeed it was created a long time ago but thanks to it a healthy community around Jenkins project has created a myriad of plugins that help to bring more features to it. And we have support for cloud environments, containers, Kubernetes and OpenShift now - all of this provided by plugins. You can find a plugin for almost any software that is somehow related to building, testing or deployment of any framework or language.
It is also the source of frustrations of many people using them. It’s because of “dependency hell” and the maintenance of it. However, with a proper approach I’m describing below it can be fairly easy mitigated - all thanks to containers.
2. It has a nice GUI
I know, it’s a silly reason but I’m going to keep repeating it anyway - not everybody is interested or have the technical knowledge to operate from command line only. The release process is often a business-oriented activity and also many non-technical people are involved in it. They will appreciate having a clear view on the whole process. Some even use a dedicated display to track each deployment. While other projects, especially the new ones such as Tekton, are designed to work with Kubernetes, they still missing a nice way to manage it from GUI.
3. Easy to migrate
There are so many new things you need to learn when working with OpenShift that at least you can use your knowledge on Jenkins. Just make sure you’re doing it right - see below for some tips.
4. Support for shared library
It is one of the underestimated features of Jenkins. The shared library offers a nice way of standardizing CI/CD pipelines by providing a versioned library with all the steps defined there. No more copy and paste - this approach can work when you’re dealing with a few apps but not when you grow rapidly. For a bigger scale, you need something better or else you’ll end up with an unmaintainable, horrific set of custom pipeline configurations.
5. Integration with OpenShift
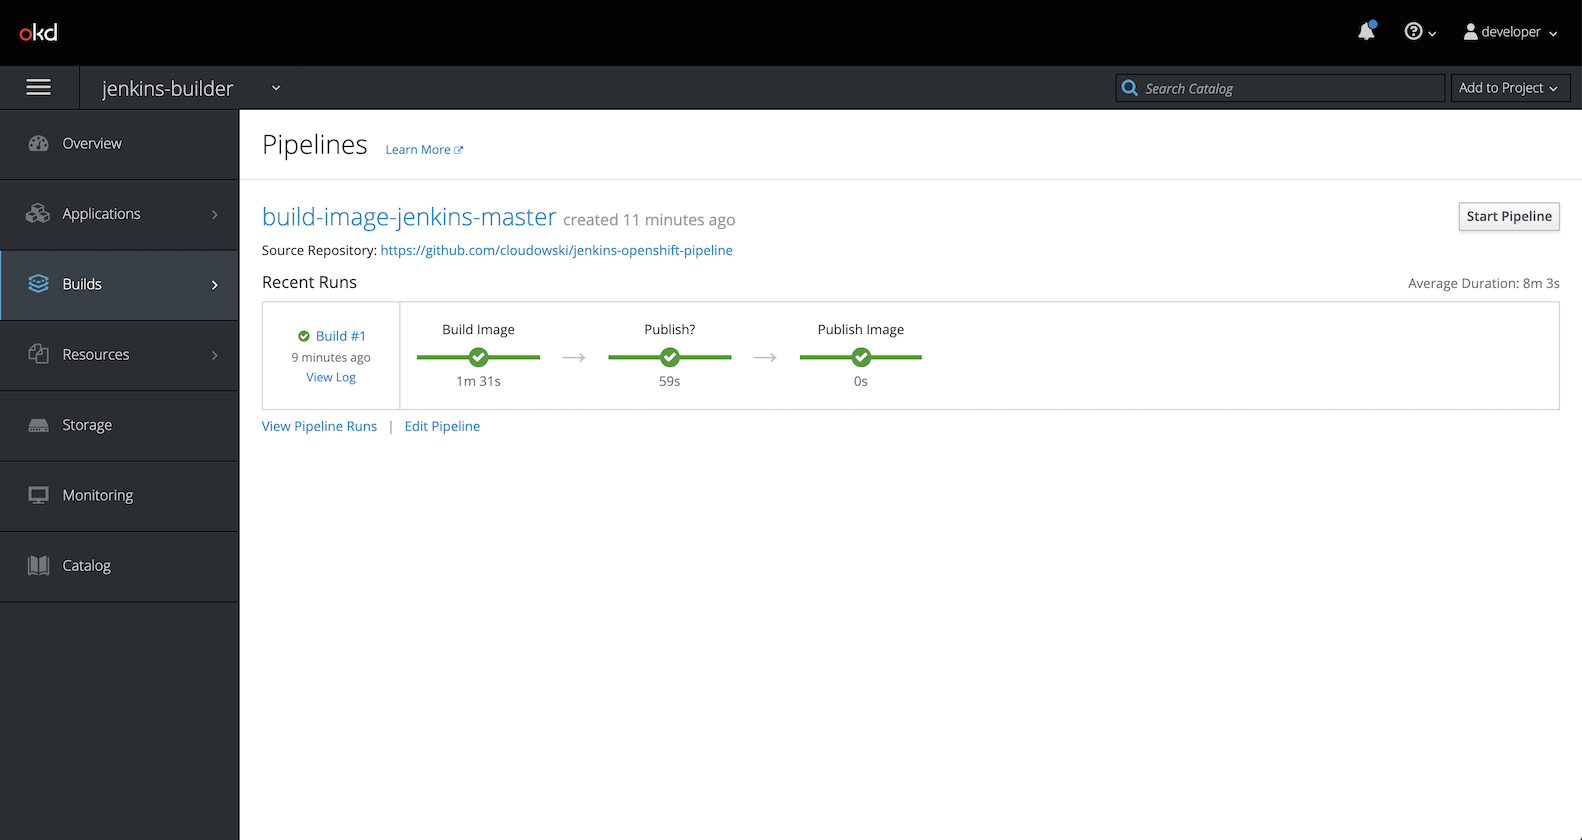
Red Hat chose Jenkins to be a CI/CD orchestrator for applications running on OpenShift and has also prepared a set of plugins to integrate it with its API. We can leverage it in the following ways:
- keep all pipeline definitions (where to find Jenkinsfile or its content embedded directly in it) as
BuildConfignative OpenShift objects rather than configuring from Jenkins. - all these defined pipelines can be launched from OpenShift API (or cli - e.g.
oc start-build job-name) and their progress is visible in OpenShift web console - no need to log in to Jenkins to track them - synchronize
Secretobjects to Jenkins credentials without managing them in Jenkins directly - integrated authentication and authorization enables users with view,edit and admin OpenShift roles mapped to Jenkins users. Although it is very simple (only three roles) it is also very easy and in most cases sufficient.
Keeping Jenkins maintainable
By combining integration features and running Jenkins as a container with external storage enables us to treat it merely as a job orchestrator without all the hassle of maintaining it. Store everything as code and let Jenkins with all its plugins do what it’s been ordered to do. And nothing more.
There are some rules, however, that need to be followed to really keep it under control and avoid configuration drift. Stick to them and you will no longer fix any Jenkins instance - just relaunch it and let OpenShift do its magic.
Keep data on a persistent volume
It’s easy to implement. Just choose jenkins-persistent template to create a Jenkins instance. All history and temporary files will be kept there. In worst-case scenario when you broke something really bad you would lose only job history (and your custom jobs created outside of OpenShift but you know already it’s a bad idea).
Additionally, it also makes Jenkins resilient to any types of outages - Kubernetes scheduler will keep it running on a healthy node or restart it if it becomes unresponsive.
Define all pipeline definitions outside of Jenkins
You can play with custom jobs and create them all you want but for real production-ready pipelines use BuildConfig object. You have a choice of putting there the whole Jenkinsfile content or point to a repository where it’s kept.
That also limits the usage of Freestyle jobs in Jenkins but that shouldn’t be a problem - you can always define them as a single-stage pipeline.
Use Secrets as credentials
Leverage openshift-jenkins-sync-plugin to map Secrets to Jenkins’ credentials. There are a couple of types of credentials that will be matched against Secret types with proper labels assigned to them - check the documentation in repo for more details (the official one at https://docs.openshift.com seems to be a little outdated).
Oh, and I also recommend keeping this plugin up-to-date since they often fix some bugs and add more features to it. Later on I’m going to show you how.
Don’t update plugins manually or install them at startup
Plugin maintenance is the biggest problem with Jenkins which is quite easy to fix. When you need to update a particular plugin or add a new one just modify plugins.txt file kept in a repository and rebuild it. See below for more details.
This also enables you to rollback a misbehaving plugin. Actually, it’s even better - you can rollback to last working instance of Jenkins keeping all the history and dependencies. In traditional downgrade process available in Jenkins, you rollback only a single plugin, not its dependencies.
And please also don’t use INSTALL_PLUGINS environment variable to install plugins at startup. First of all, it takes a lot of time and, secondly, it often fails because Jenkins mirrors infrastructure often is unavailable or out of sync.
Use code for custom modifications
You may want to modify Jenkins instance and you may be tempted to do it using GUI. Don’t. Most plugins can be configured with configuration as code which is a dedicated plugin configured via yaml file. There are many examples on how to write them and the only thing you need to take care is how to provide this yaml file - include it in the image or host it externally. Whatever you choose will be far better than manual configuration.
Create a custom Jenkins image - step by step
It’s time to create a process of building custom Jenkins images. In the following example I’m going to use Minishift but it’s also applicable to any OpenShift cluster (thanks to ImageStream abstraction layer).
We will create a process that will build a new image using source-to-image builder available in OpenShift, pipeline defined in BuildConfig object and Jenkins instance to orchestrate the build process.
1. Create a dedicated project
We’re going to use a dedicated namespace (a.k.a. project in OpenShift) where it’s going to be built. Let’s call it jenkins-builder.
oc new-project jenkins-builder
2. Create a dedicated repository for Jenkins config
You can reuse some of your existing repositories but I recommend creating a new one. It will become a crucial part of your CI/CD infrastructure and you should protect it.
There’s my repository you can use for testing - it’s available at https://github.com/cloudowski/jenkins-openshift-pipeline and it’s public so no credentials are required.
3. Create a Secret with git credentials
If you require an ssh key to access your repo then you need to add it got the project. For example
oc create secret generic cloudowski-ssh-secret --from-file=ssh-privatekey=$HOME/.ssh/id_rsa
Remember that it needs to be a private key and it cannot be encrypted (hope your private keys are protected by a passphrase).
4. Place files in a repo with Jenkins customization
The most important file is plugins.txt where you should put your additional plugins (see my sample file) and configuration. You can also put configuration files in configuration/ directory in a repo that would be copied to Jenkins home directory. In my example, I have there a configuration-as-code plugin configuration.
5. Create a Jenkins instance
We need to solve the chicken or the egg problem first. To build Jenkins we could use BuildConfig object but we want to create a process with promotion and custom, dynamic tags (they are not available for BuildConfig jobs).
We’ll use jenkins-persistent template to instantiate our first Jenkins (you may use jenkins-ephemeral if you have no more PersistentVolumes available in your cluster) and add environment variables that enable overriding configuration and plugins on each startup. We’re also defining a special variable (CASC_JENKINS_CONFIG) that points to a yaml file read by configuration-as-code plugin.
oc process -n openshift jenkins-persistent -p MEMORY_LIMIT=1024M | oc apply -f- -n jenkins-builder
oc set env dc/jenkins \
  OVERRIDE_PV_CONFIG_WITH_IMAGE_CONFIG=true \
  OVERRIDE_PV_PLUGINS_WITH_IMAGE_PLUGINS=true \
  CASC_JENKINS_CONFIG=/var/lib/jenkins/jenkins-casc.yaml
6. Create a BuildConfig with pipeline definition
It’s time to create a BuildConfig object that would create a Jenkins pipeline job. Use the template file from my repository and apply it:
oc process -f jenkins-pipeline-template.yaml | oc apply -f- -n jenkins-builder
For non-public repositories, you need to configure a git credential you created previously. The easiest way is to do it with cli
oc set build-secret --source jenkins-master YOUR-SECRET-NAME
oc set build-secret --source build-image-jenkins-master YOUR-SECRET-NAME
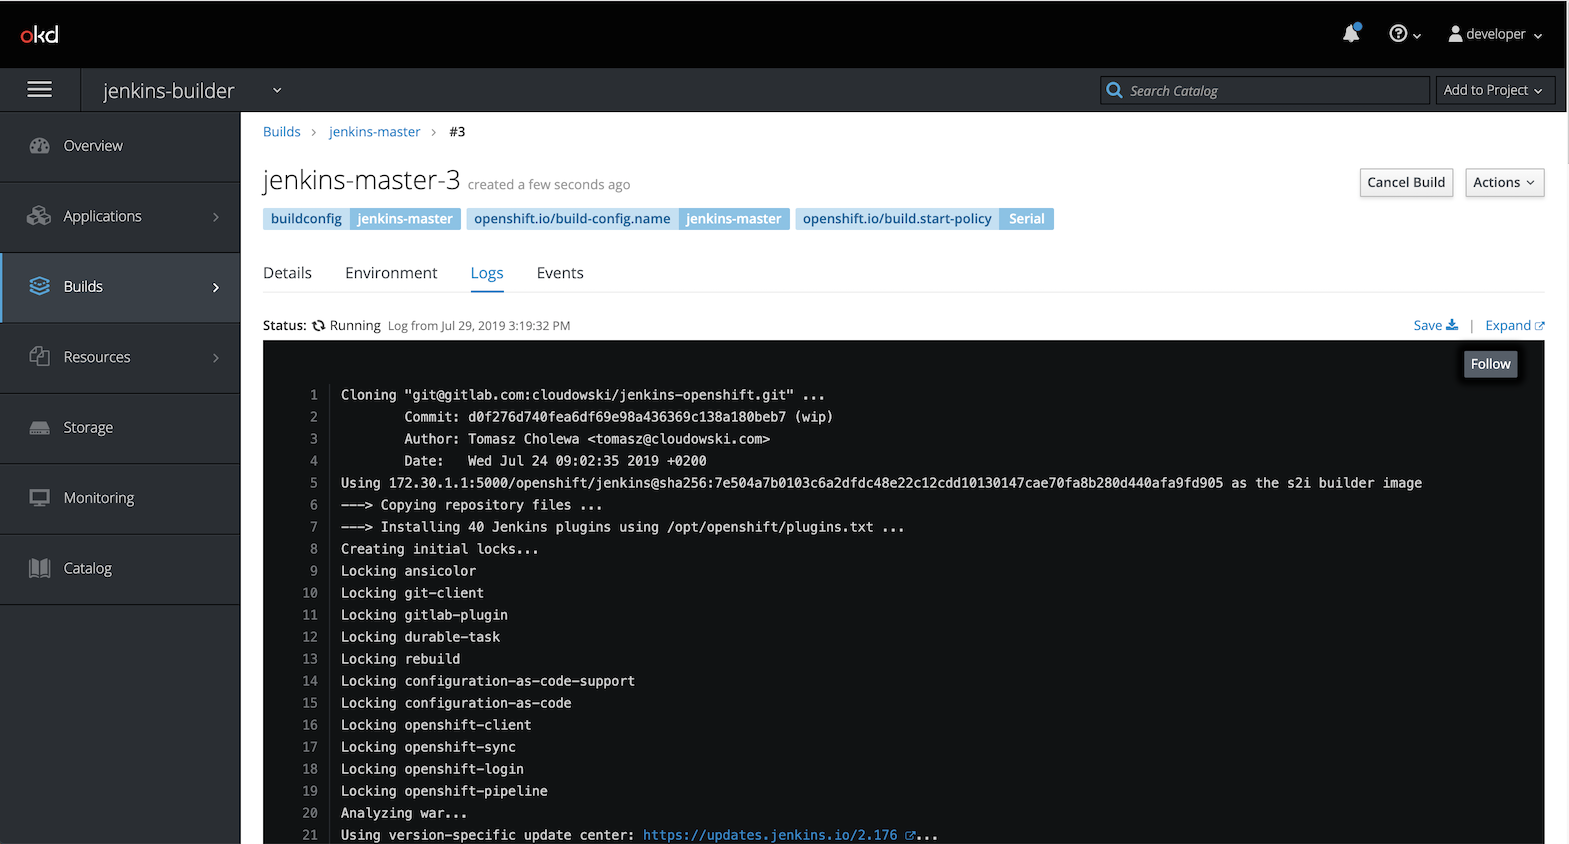
7. Build a new image with pipeline
Start it either from Jenkins, OpenShift web console or cli
oc start-build build-image-jenkins-master
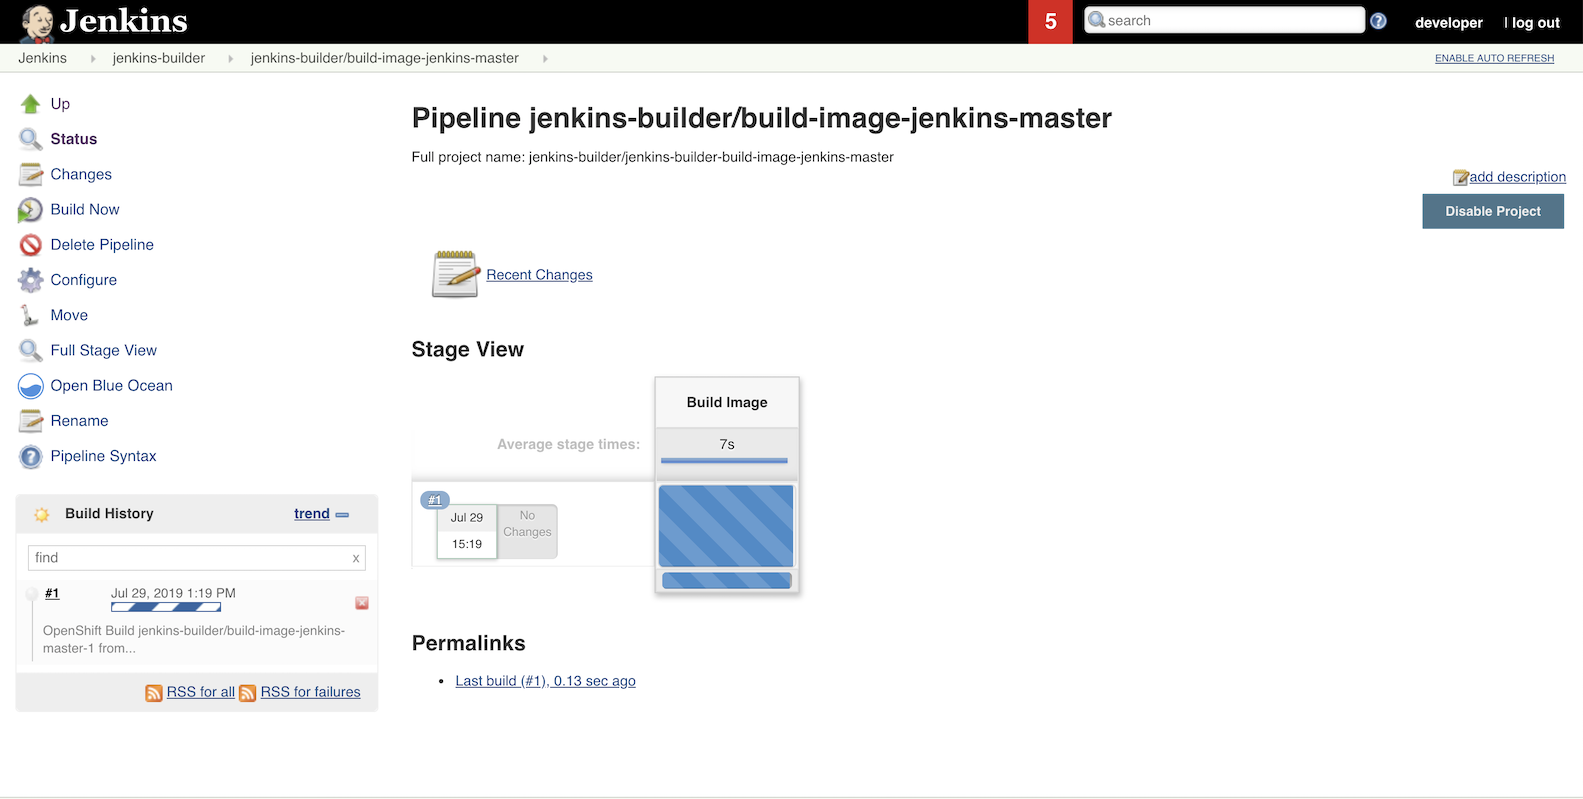
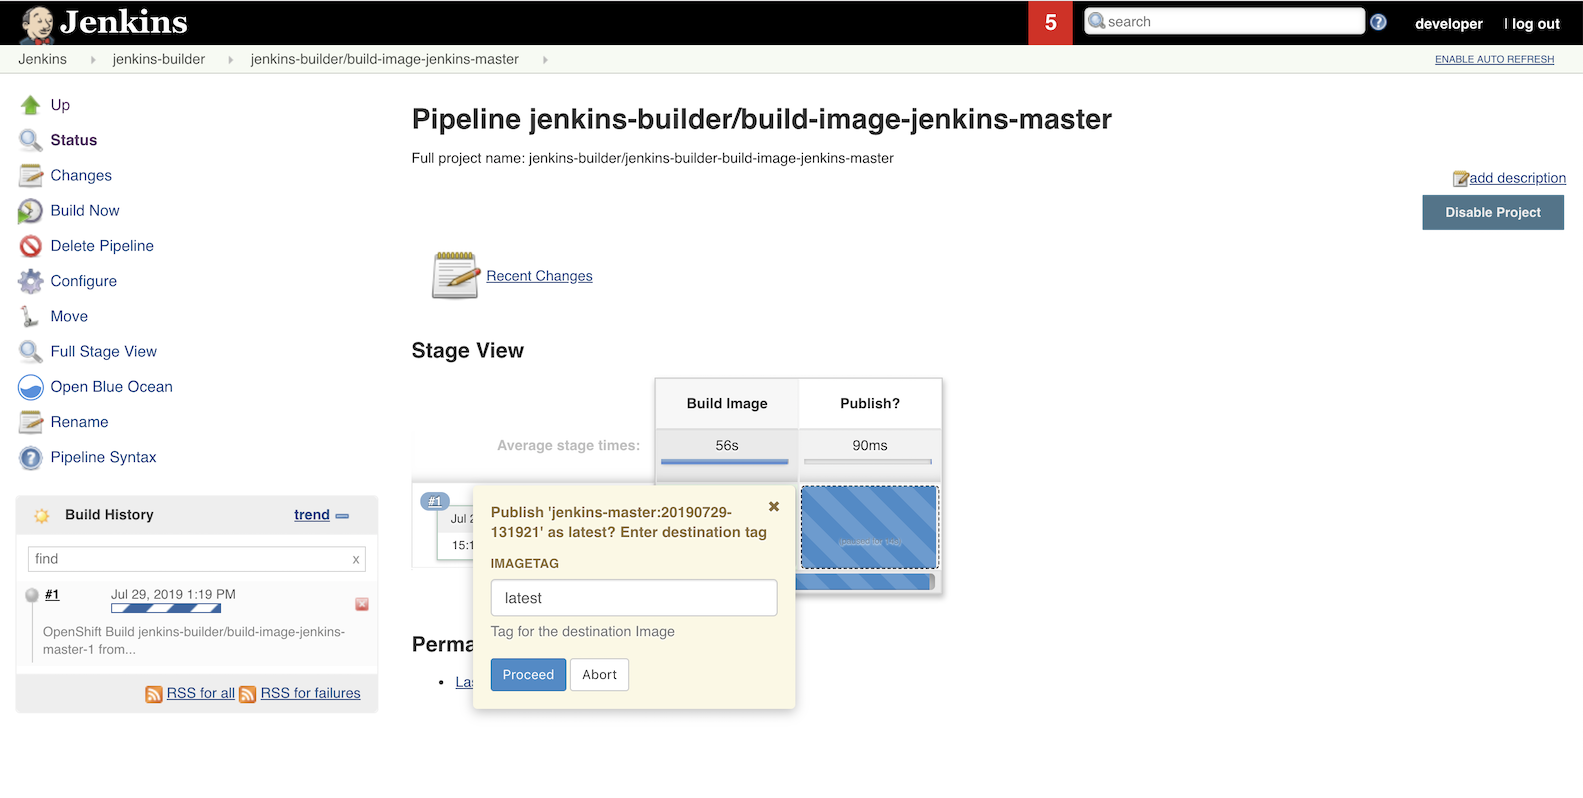
8. Use the image
Now you can use the image in a new Jenkins instance or replace the one used by Jenkins which built it (kind of Inception-like trick). Once again it’s easy with cli
oc set image dc/jenkins jenkins=jenkins-builder/jenkins-master:latest --source=imagestreamtag
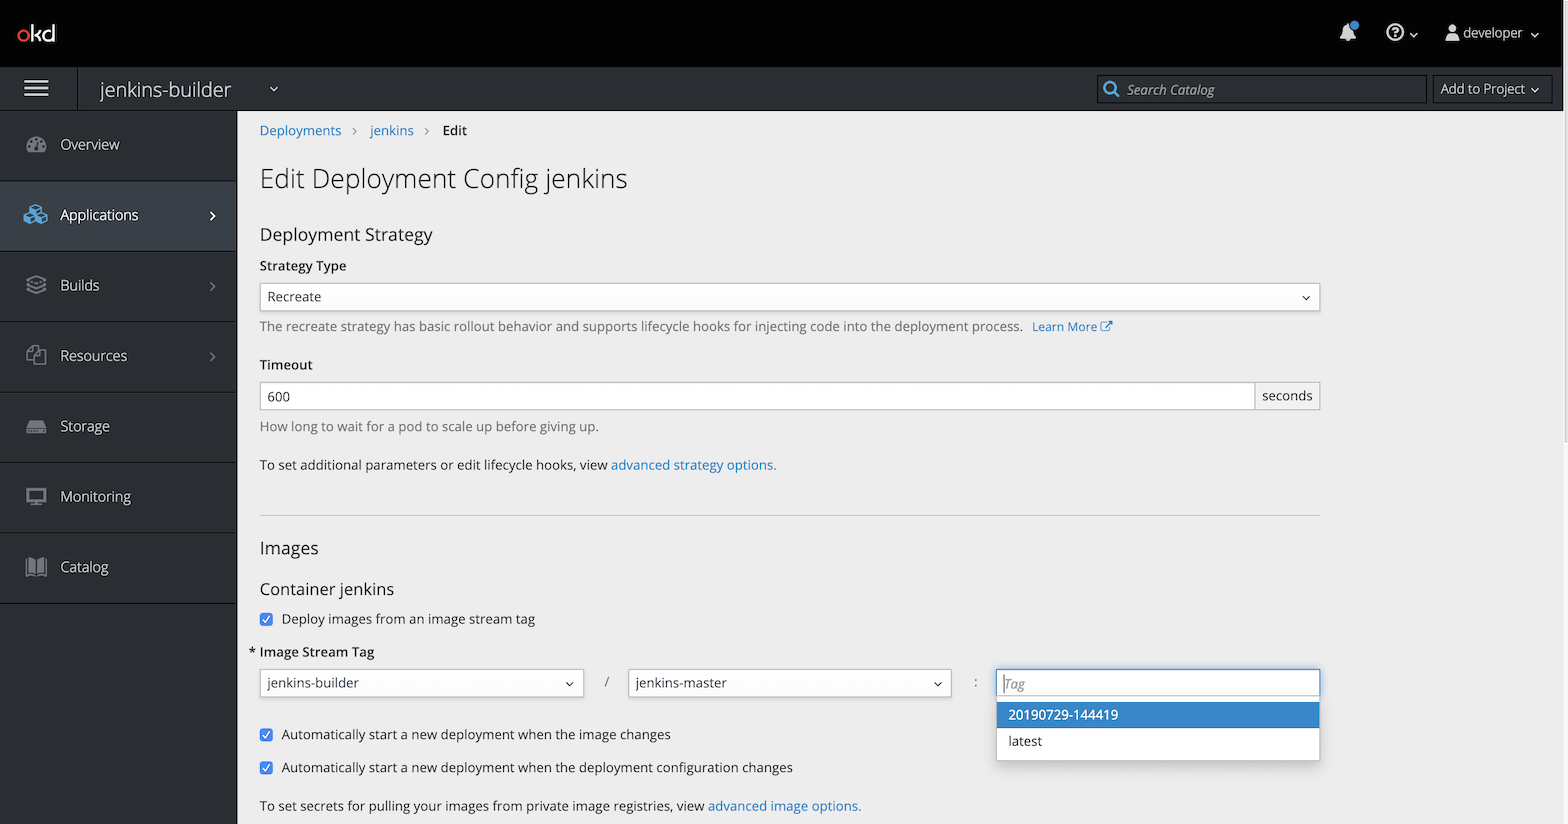
That’s it! You’ve just created a pipeline building new Jenkins container image. It’s time to use it to build great apps and deploy them on any Kubernetes or OpenShift.



Leave a comment